12 min to read
iOS All The Things - Part II
Agenda of iOS Pentesting:
Intro
Before we can start using advanced penetration testing tools on an actual iPhone, we need to address a fundamental barrier: Apple’s strict security controls. These controls, while great for user safety, limit our ability to inspect a running system. This is where jailbreaking comes in.
Jailbreaking is the process of removing these software restrictions imposed by Apple. It gives you root access (administrator-level control) to the iOS operating system. This allows you to:
- Install applications from outside the official App Store.
- Customize the operating system’s look and feel.
- Most importantly for us: Run powerful security tools that can analyze other apps and the system itself.
Jailbreaking exploits vulnerabilities (security weaknesses) in the iOS code to bypass Apple’s security layers. The goal is always the same: to break the “chain of trust” and gain the ability to run unsigned code.
The general process can be summarized in the following chart:
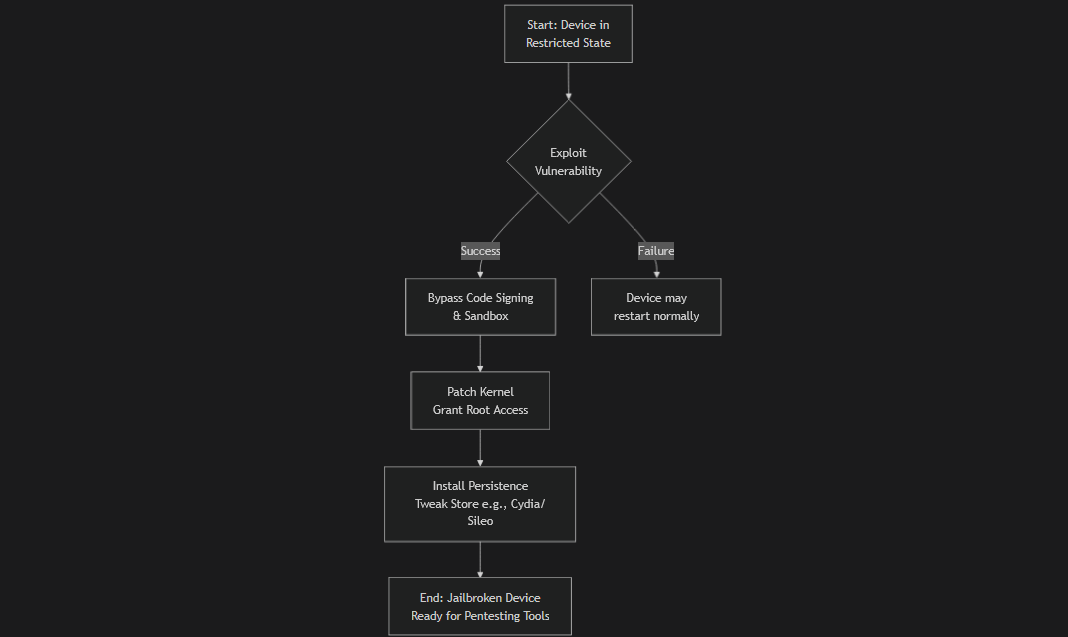
Here’s the breakdown:
a. Exploit a Vulnerability: The jailbreak tool uses a specific bug or combination of bugs in the iOS software. These can be in the web browser (a “browser-based” exploit) or in a file the device opens.
b. Bypass Security Protections: The exploit is used to bypass the two main security features:
- Code Signing: This allows the device to run the jailbreak’s own code, which is not signed by Apple.
- Sandbox: This escapes the app’s restricted container, giving the code access to the entire filesystem.
c. Patch the Kernel: The “kernel” is the core of the operating system. The jailbreak modifies it in memory to permanently disable the security checks (like code signing enforcement) while the device is running.
d. Install Persistence and a Package Manager: Finally, the tool installs a “package manager” like Cydia or Sileo. This is an alternative app store specifically for installing tweaks and command-line tools (like those we need for pentesting). It also adds a helper to re-apply the jailbreak after a device reboot (since the kernel patches are not permanent by default).
For a penetration tester, a jailbroken device is a laboratory. It is the equivalent of having administrative access on a target server. It allows us to:
- Intercept network traffic (SSL Pinning).
- Analyze and modify app data at runtime.
- Dump decrypted application binaries for static analysis.
- See the real-time behavior of the operating system.
Types of Jailbreaking
Not all jailbreaks are created equal. The main difference between them lies in what happens when you restart the device. This characteristic of the jailbreak’s ability to survive a reboot. It is categorized into four main types.
The following chart illustrates how each type behaves during a device reboot:
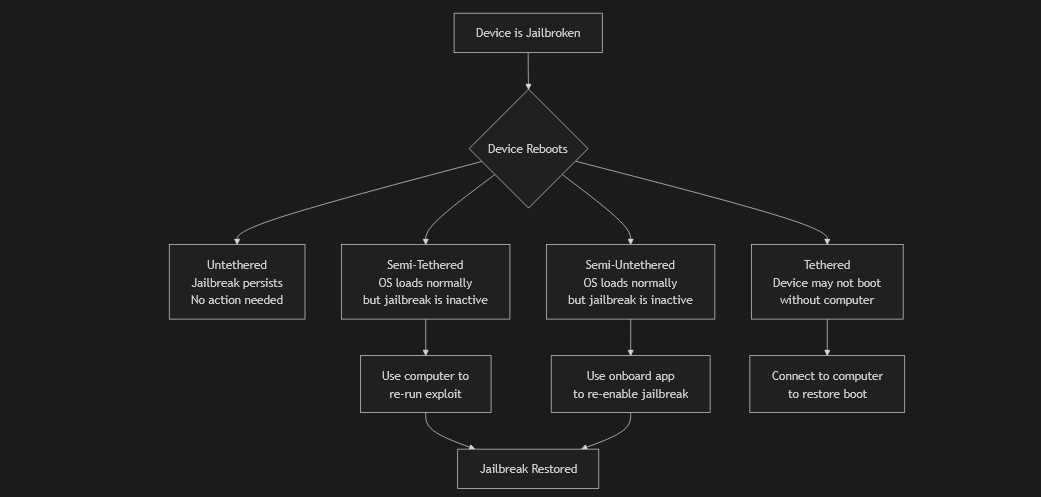
Here’s the breakdown:
a. UnTethered: if reboot the device, the ios is still jailbreaking.
b. Tethered: if reboot the device, the ios is return to normal status(means not jailbreak).
c. Semi-Tethered: This type of jailbreak allows a user to reboot their phone normally, but upon doing so, the jailbreak and any modified code will be effectively disabled, as it will have an unpatched kernel. (need to do re-jailbreak because not open in optima stage in jailbreak).
d. Semi-Untethered: if reboot the device , the ios is return to normal status but the device have ipa package can use it to do jailbreak again without using any cables.
Important Tip: A semi-untethered jailbreak is often the best choice because it allows for maximum flexibility. If your testing causes a device crash and reboot, you can quickly re-enable the jailbreak directly from the device without needing to be near a computer, ensuring you can get back to work quickly.
Using that website to know what’s that tool compatible with version of ios device to make jailbreak.
Pull & Push IPA Packages
Once your iOS device is successfully jailbroken, the next step is to install a package manager like Sileo, Cydia, or Zebra. Think of this as an “alternative App Store” specifically for jailbroken devices, where you can find powerful tools and tweaks that Apple doesn’t allow.
One of the most important tools you can install is Filza File Manager. This is a powerful file explorer that gives you full access to the entire iOS filesystem. something that is normally restricted on a non-jailbroken device.
Filza Uses:
- Browse System Files: View and edit files across the entire operating system.
- Access App Containers: Open the sandboxed directories of installed applications.
- Extract IPA Files: This is a critical function for penetration testers.
How to Extract an IPA using Filza
Another meaning pull any installed app from your device for analysis:
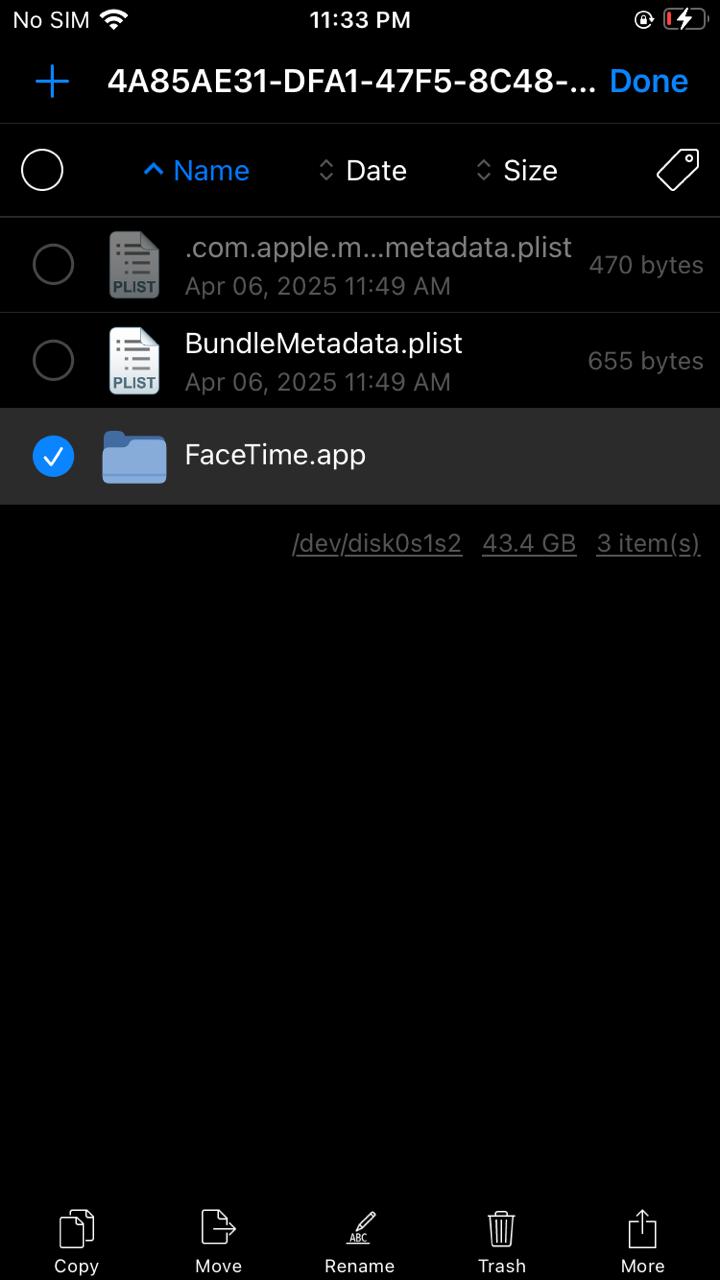
a. Open Filza and navigate to the applications directory: ‘/var/containers/Bundle/Application/’
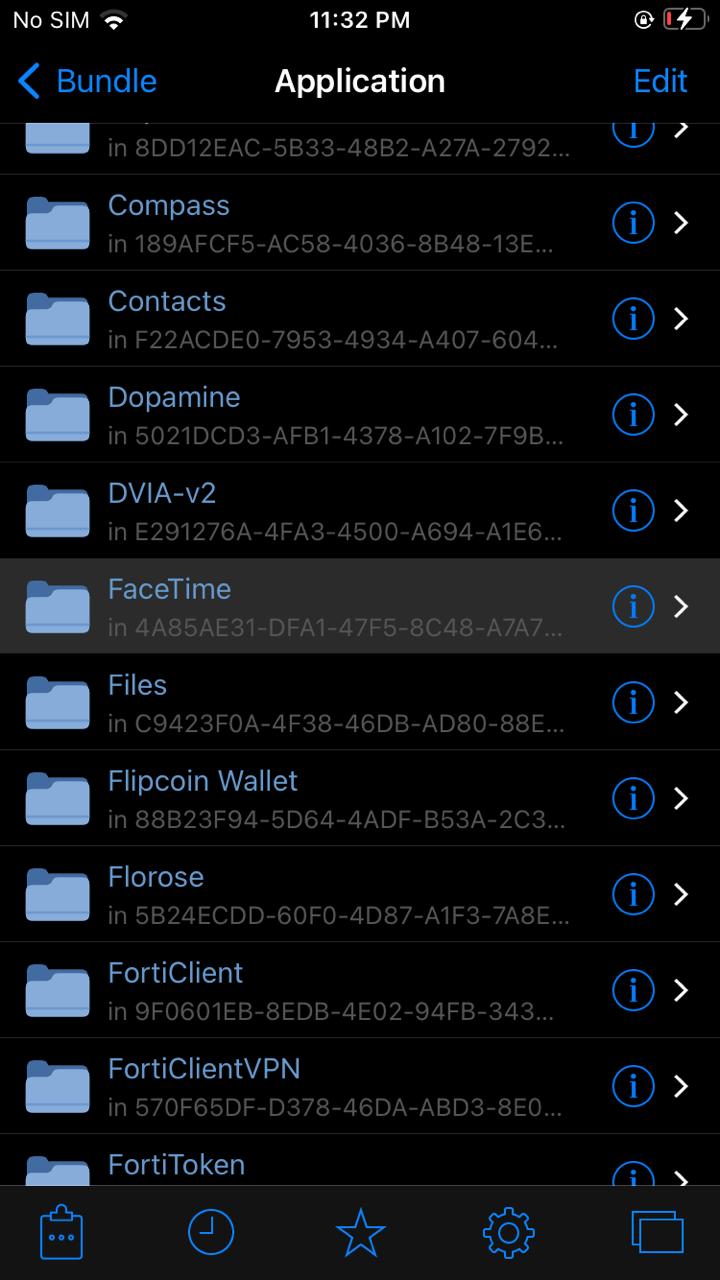
b. Find the App: You’ll see folders with random names. Open each one to find the ‘.app’ bundle for your target application (e.g., Facetime.app).
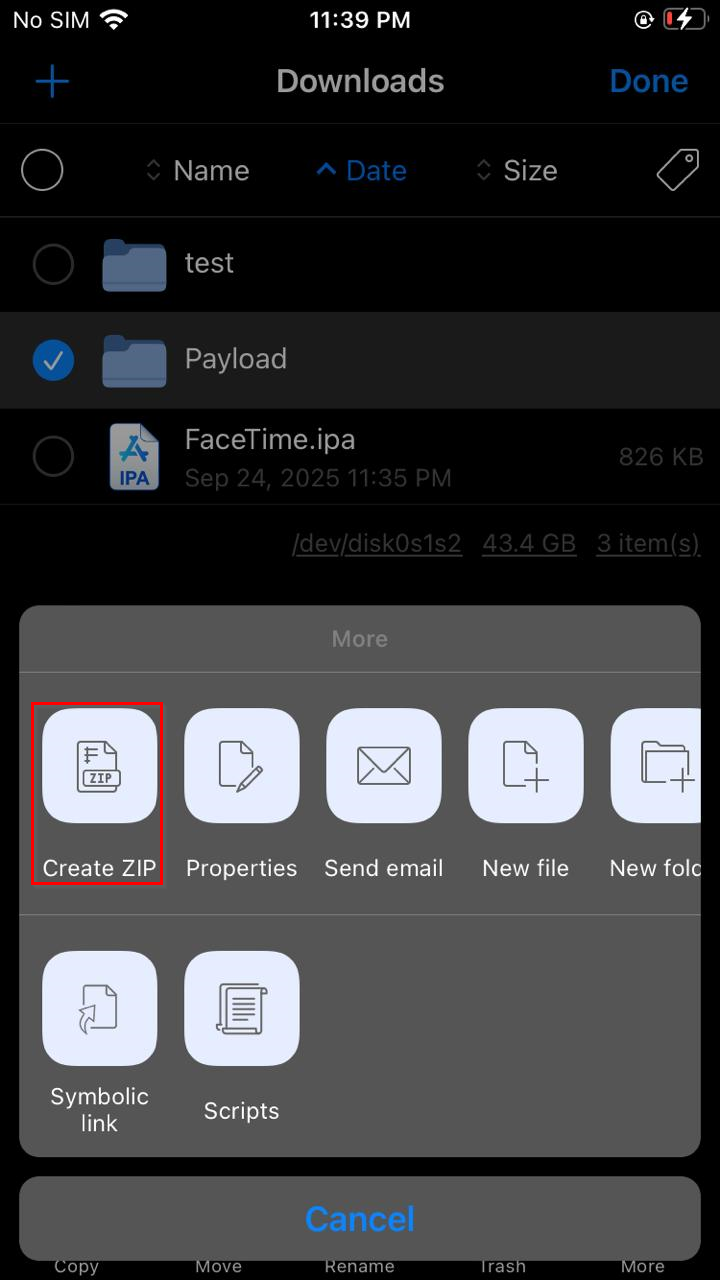
c. Go to any directory, such as /var/mobile/Downloads. Create a new folder named Payload. Paste the copied ‘.app’ bundle into this Payload folder.
d. Compress the Payload folder into a ZIP file. Long-press on the Payload folder and select the “Compress” option. This will create a Payload.zip file.
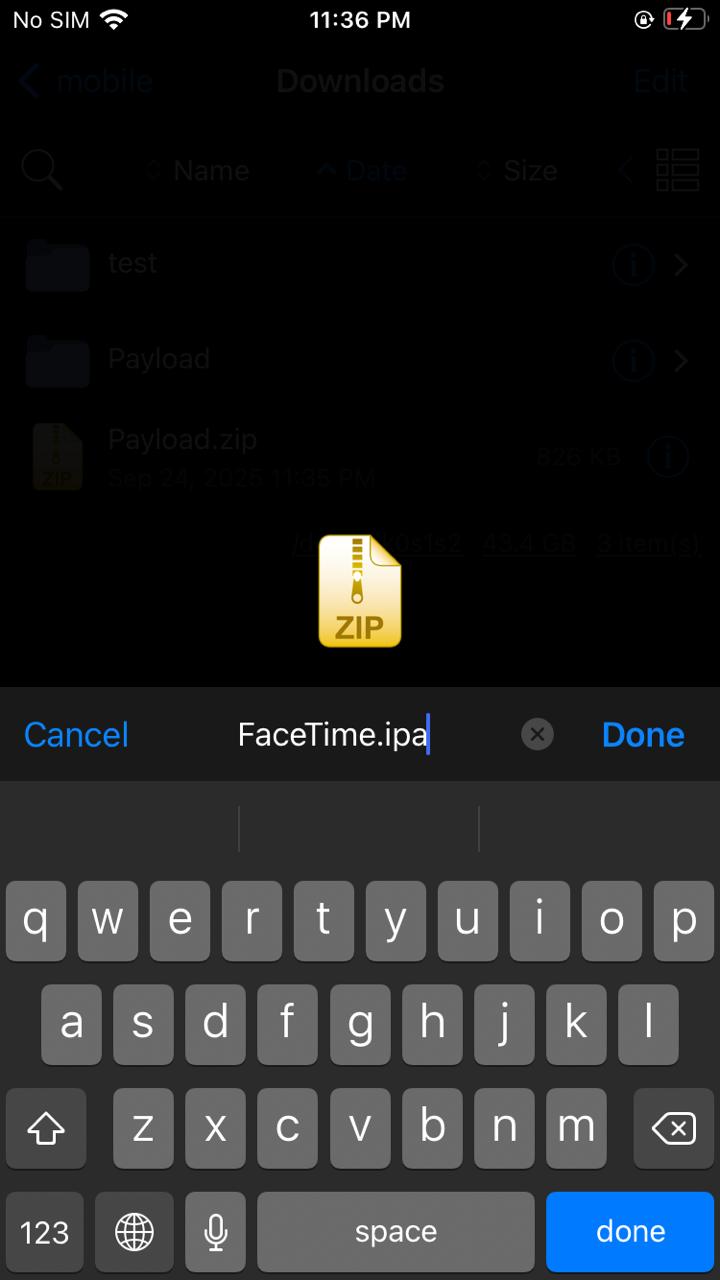
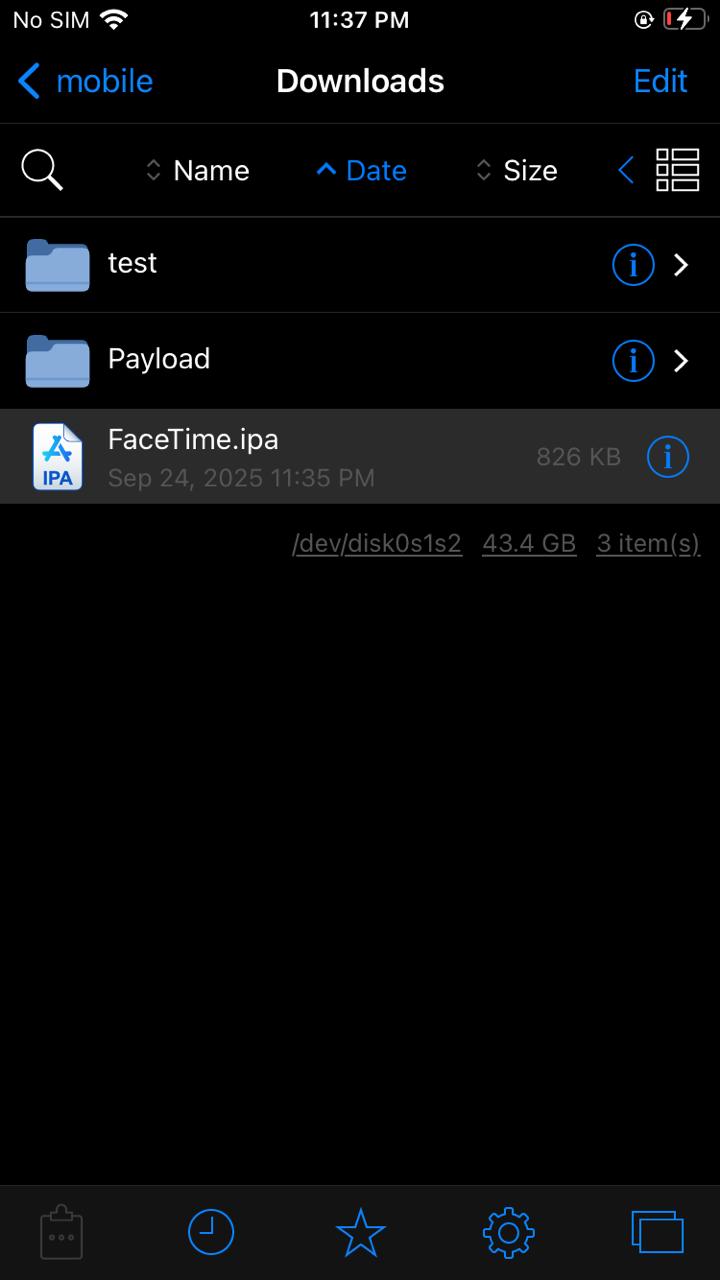
e. Rename the Payload.zip file to YourAppName.ipa. An IPA file is essentially a standard ZIP archive with a specific structure and a different file extension.
f. The ‘.ipa’ file is now ready for analysis. You can transfer it to your own machine (e.g., Kali Linux system) using a secure transfer tool like scp (Secure Copy).
To move the extracted IPA file from your iOS device to your computer, you need a connection between the two devices. This is typically done using SSH (Secure Shell).
-
Method 1: Using SSH from Your Computer
Ensure SSH is enabled on your jailbroken iOS device and that both devices are on the same network.
scp mobile@[device_ip]:/var/mobile/Downloads/YourAppName.ipa /path/on/your/kali/ -
Method 2: Using NewTerm on Your iOS Device
Alternatively, you can use NewTerm (available in Sileo/Zebra) a terminal emulator for iOS. to push the file to your computer:
a. Install NewTerm from your package manager.
b. Open NewTerm and use scp in reverse:
scp /var/mobile/Downloads/YourAppName.ipa kali@[KALI_IP]:/home/kali/Downloads/

# The same scp command can also be used to transfer an IPA package from your computer to your jailbroken device (Push)
scp /home/kali/Downloads/YourAppName.ipa mobile@[device_ip]:/var/mobile/Downloads/
This ability to extract IPAs directly from a jailbroken device is a game-changer for security testing. It allows you to:
- Perform static analysis on real applications using tools like Ghidra or Hopper.
- Study the app’s compiled code, configuration files, and resources.
- Identify potential vulnerabilities without needing the original source code.
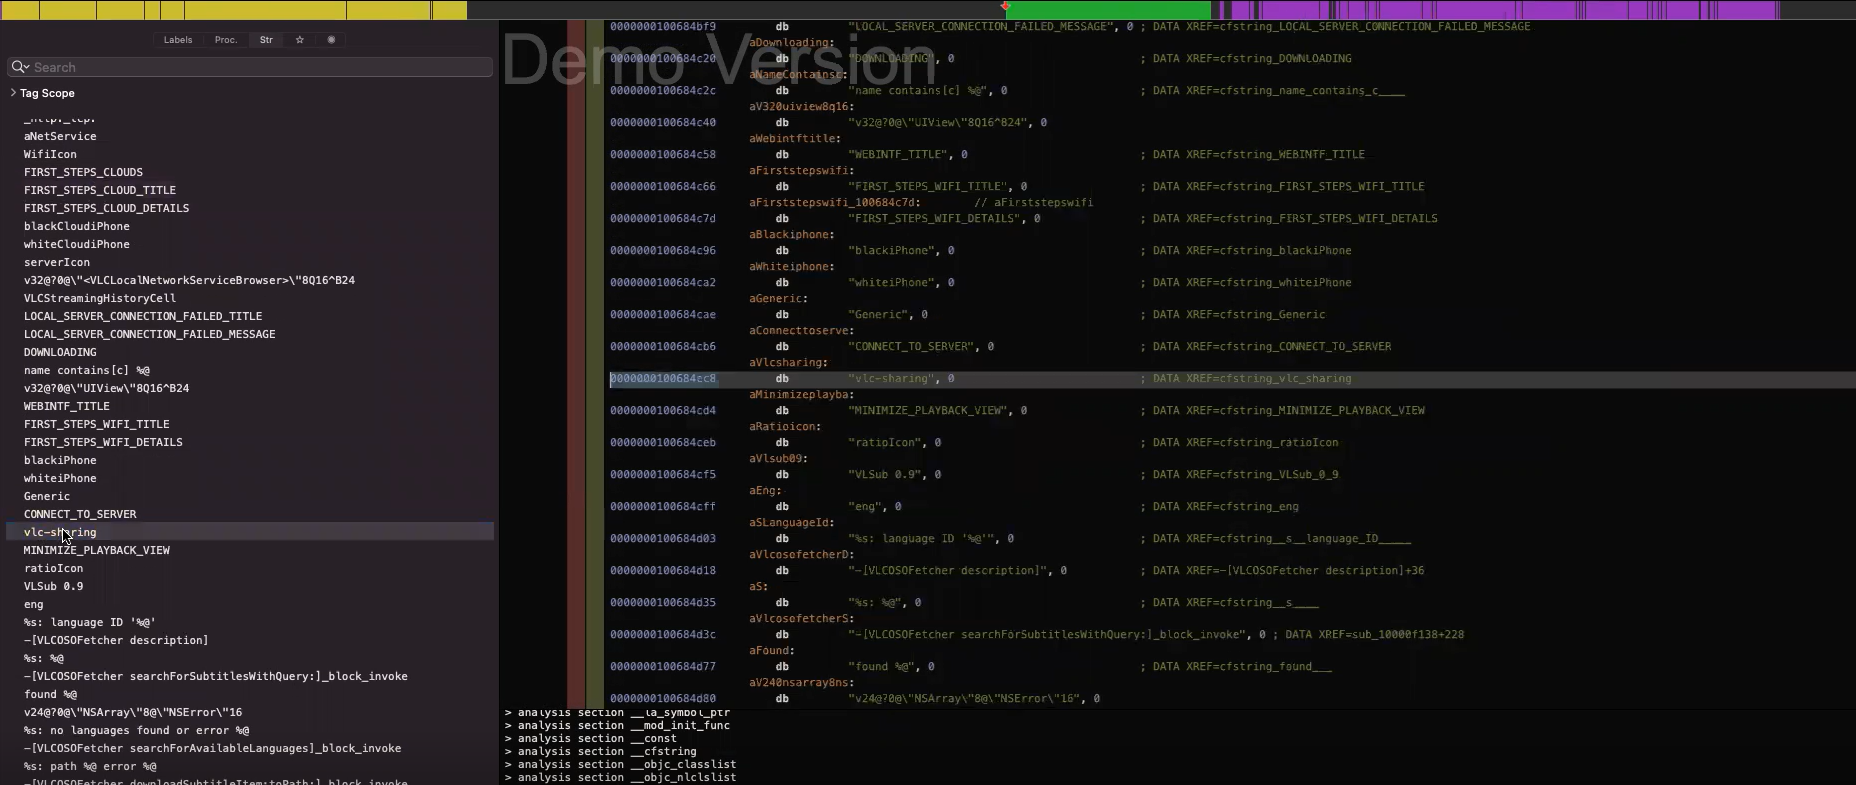
Analyzing Decrypted Executables with Hopper or Ghidra
After transferring an IPA package to your computer, the next step is to analyze the application’s main executable file. You can extract this file by unzipping the IPA package and navigating to the ‘Payload/YourApp.app’ folder.
When you try to analyze an App Store application using reverse engineering tools like Hopper or Ghidra, you’ll encounter a significant obstacle: the main executable file is encrypted. Apple encrypts applications from the App Store to protect intellectual property, which means static analysis tools will show garbled or meaningless code.
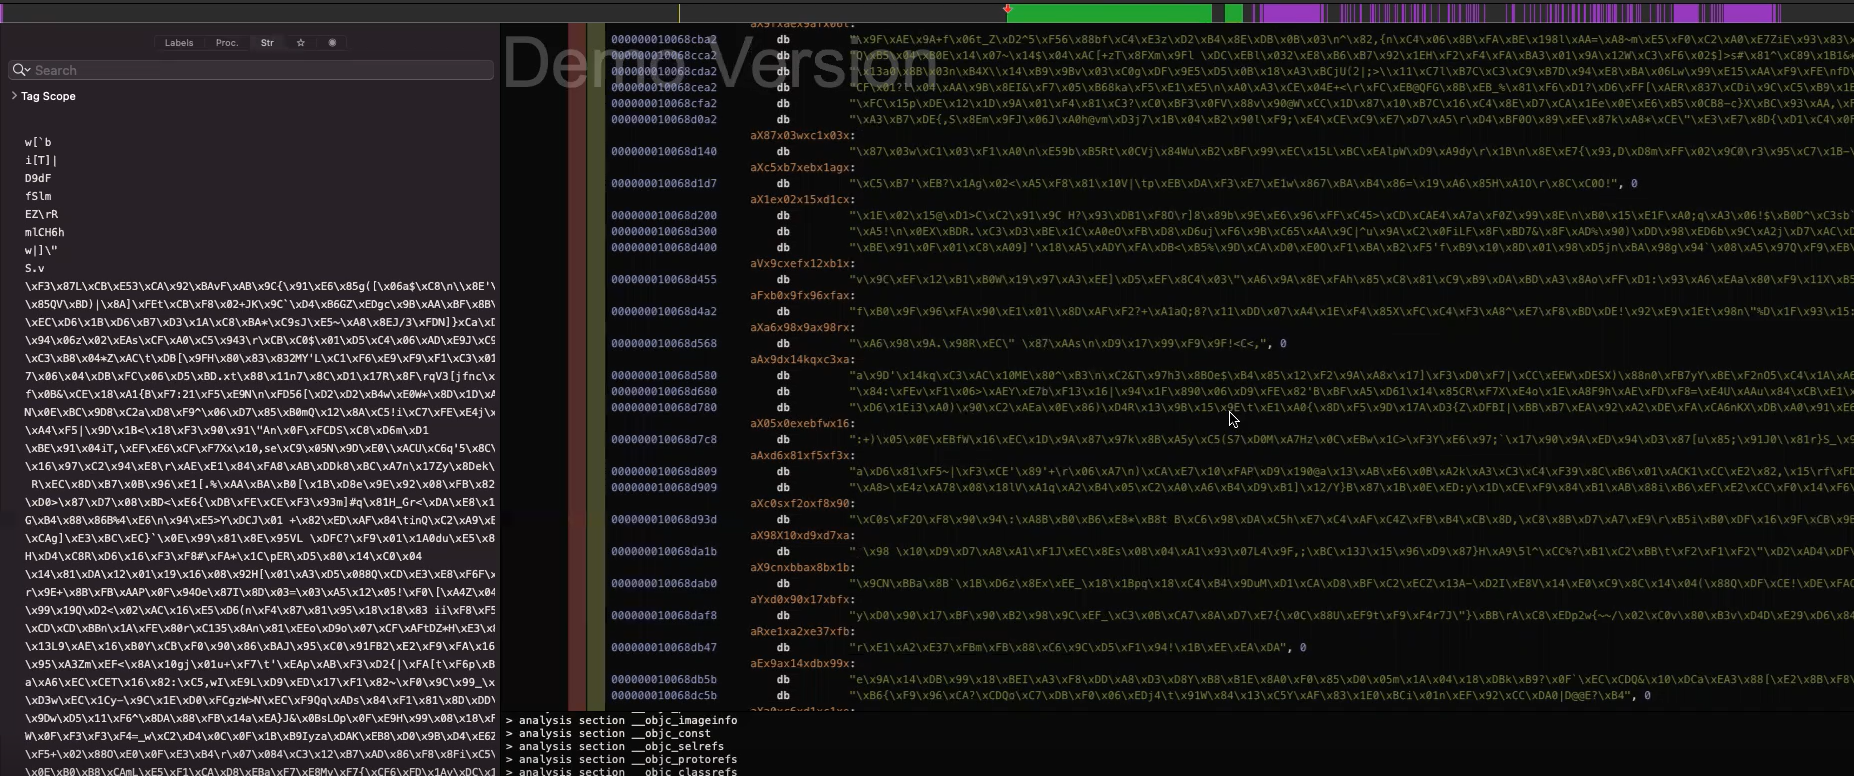
When an iOS application runs, the system must decrypt it in memory to execute the code.
To overcome this encryption barrier, we use ‘frida-ios-dump’ a powerful tool that captures a running application directly from the device’s memory. Here’s how it works:
a. Install frida-server from sileo.
b. Run the target application on your jailbroken device.
c. Execute frida-ios-dump from your computer while the app is active.
# to forward ssh connection
iproxy 2222 22
# run frida-ios-dump
./dump.py -H device-ip -u user -P password -p 2222 (bundle/name)
d. The tool dumps the decrypted version of the application from memory.
e. You now have a decrypted IPA that can be properly analyzed.
Setup BurpSuite
Configuring Burp Suite to intercept traffic from an iOS device is crucial for analyzing application communication. Here’s a guide:
Prerequisites:
- Burp Suite Community/Professional installed on your computer.
- iOS device and computer on the same Wi-Fi network.
Step 1: Configure Burp Suite Proxy
a. Open Burp Suite and go to the Proxy tab → Options.
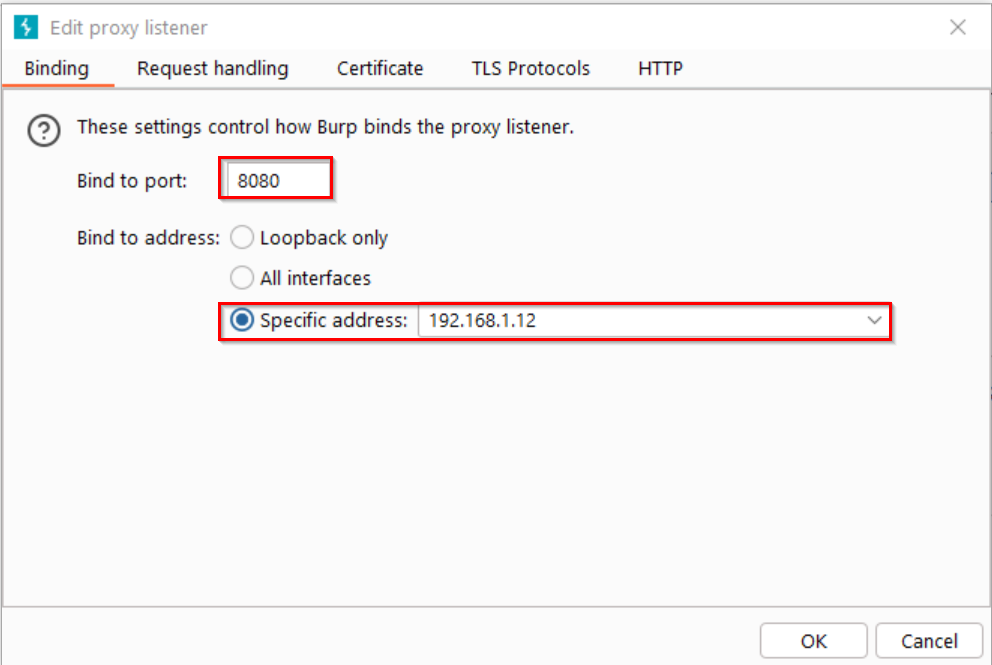
b. Add a new proxy listener:
- Bind to port: 8080 (or any available port)
- Bind to address: Specific address (your computer’s IP) or All interfaces
- Example: 192.168.1.12:8080
c. Verify the certificate generation is enabled in SSL settings.
Step 2: Configure iOS Device Network Settings
a. Find your computer’s IP address:
- Windows:
ipconfigin Command Prompt. - Linux/macOS:
ifconfigorip addrin terminal
b. On your iOS device:
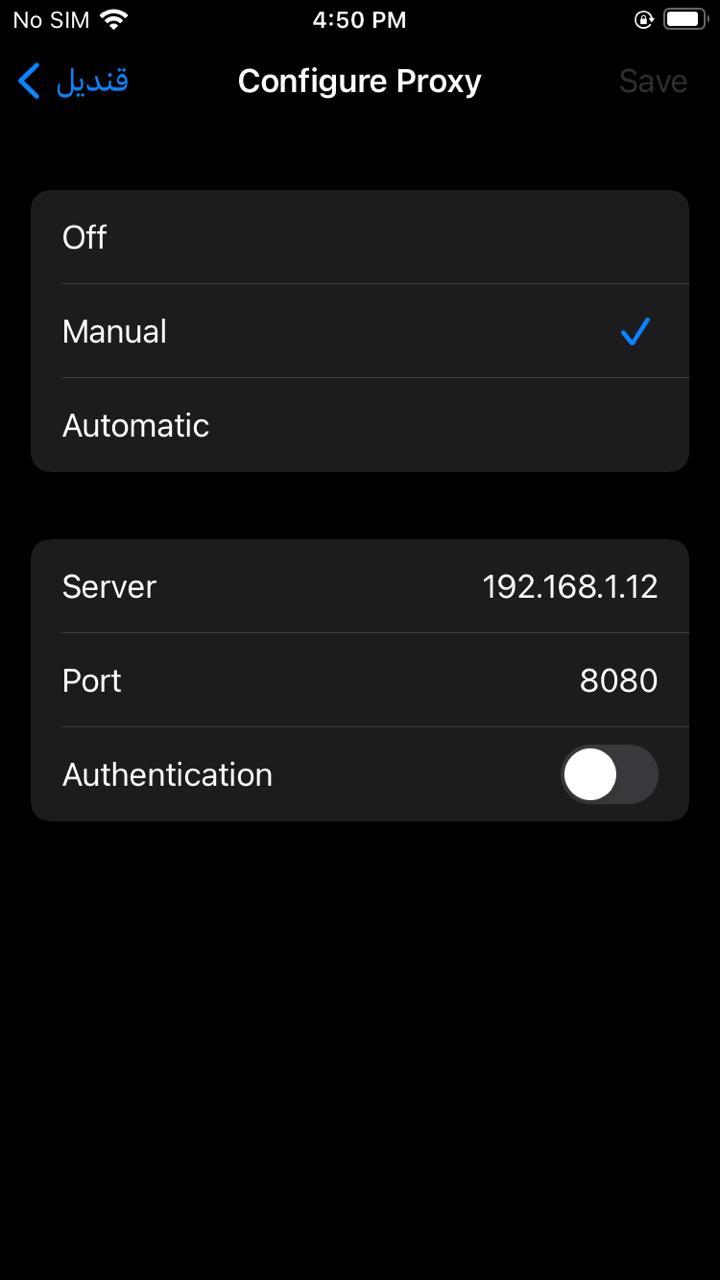
- Go to Settings → Wi-Fi
- Tap the information (i) icon next to your connected network
- Scroll down to Configure Proxy → Select Manual
- Server: Enter your computer’s IP address
- Port: 8080 (or your chosen Burp port)
- Authentication: Off (unless you configured it in Burp)
Step 3: Install Burp’s CA Certificate on iOS
a. On your iOS device:
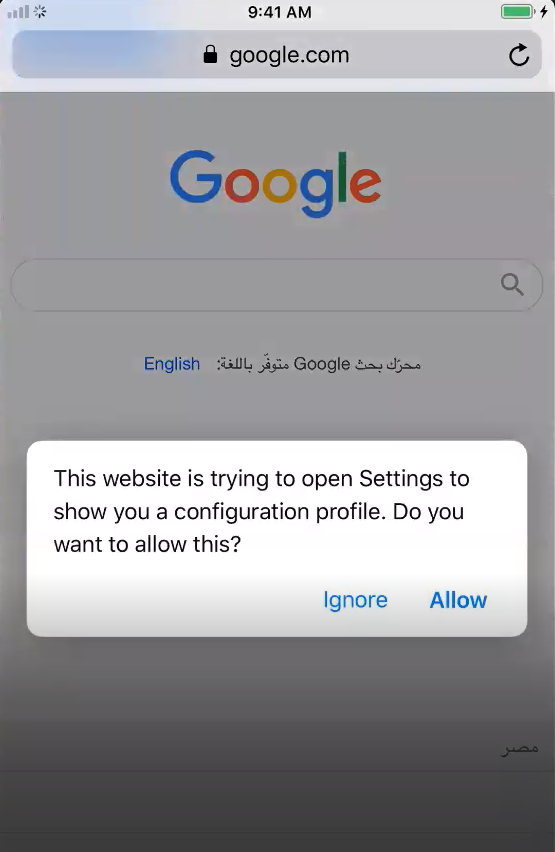
- Open Safari and navigate to: http://burpsuite, http://burp/cert or http://[your-computer-ip]:8080
- Tap CA Certificate to download the certificate
b. Install the certificate:
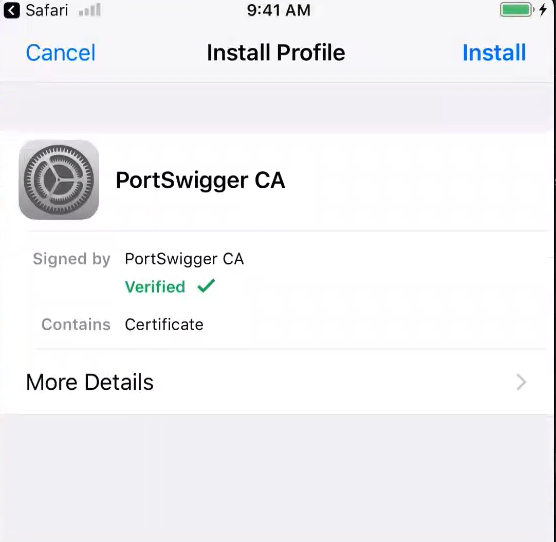
- Go to Settings → General → VPN & Device Management
- Tap on Burp Suite CA under “Downloaded Profile”
- Tap Install and follow the prompts
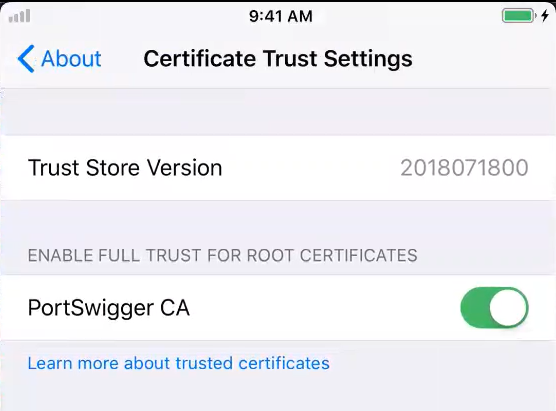
- Go to Settings → General → About → Certificate Trust Settings
- Enable full trust for the Burp Suite root certificate
Step 4: Verify the Setup
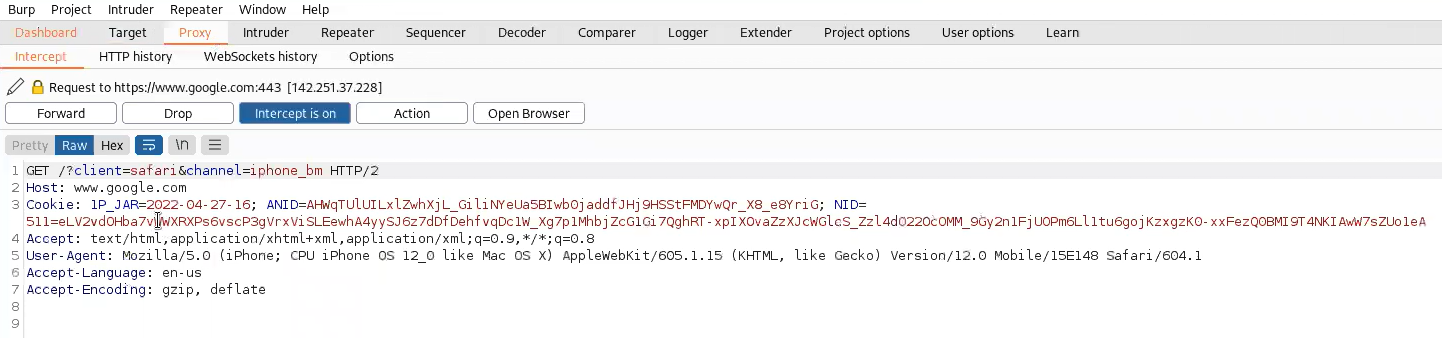
a. In Burp Suite, ensure Intercept is on
b. On your iOS device, open any app or website
c. Check Burp’s Proxy tab → Intercept to see captured traffic
d. Test HTTPS sites to confirm SSL interception works
This setup enables you to intercept, analyze, and modify all HTTP/HTTPS traffic between your iOS device and the internet, which is fundamental for comprehensive iOS application security testing.
Tools & Tweaks
Here’s a overview of the essential tools:
Jailbreak Environment Setup
a. Device Specification: iPhone 6s running iOS 15.3
b. Jailbreak Tools:
- Dopamine - Used for jailbreaking iOS 15.3
- TrollStore - Essential for permanent IPA signing and installation
IPA Extraction Solutions
TrollStore Method:
- Allows clean IPA extraction without app crashing
- Bypasses code signing requirements permanently
- Provides stable environment for application analysis
Alternative Method:
- AppSync Unified - Tweak that disables signature verification
- Enables installation of unsigned IPA packages
- Useful when TrollStore isn’t compatible
- Install it:
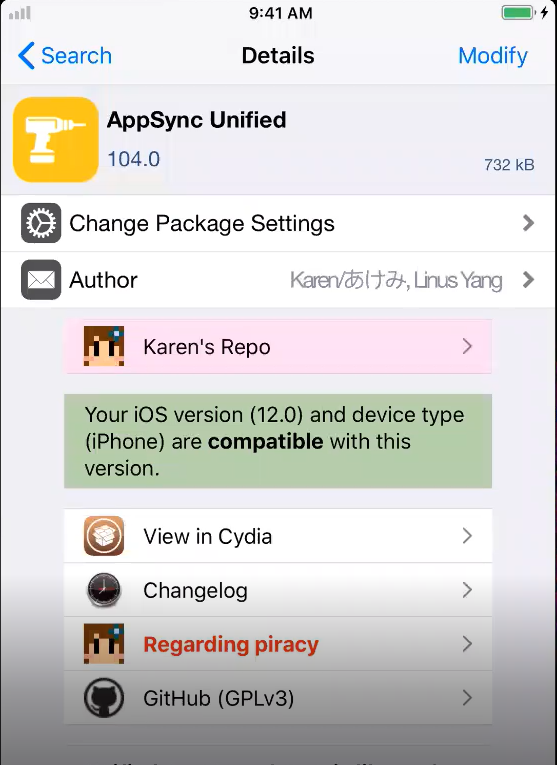
- Go to Safari and open the above link then choose the compitable deb file
- Press on it and that take you to sileo
- Get on that tweak
Core Penetration Testing Tools:
- Frida: Dynamic instrumentation toolkit
- Objection: Runtime mobile exploration (built on Frida)
- LLDB: Debugger for low-level analysis
- ldid: Link identity editor for code signing
- frida-ios-dump: Memory dumping tool for decrypted IPAs
- And other tools that we will learn about in the coming parts
Here’s a overview of the tweaks:
Tweak: is a small piece of software that modifies the behavior or appearance of your iOS device without changing the original iOS code. Think of it like a “mod” for your iPhone. it customizes or enhances features that Apple doesn’t allow you to change normally.
Tweaks are installed through package managers like Cydia, Sileo, or Zebra on jailbroken devices. These are like “alternative app stores” specifically for jailbreak modifications.
Tweaks work by hooking into existing iOS functions and altering their behavior. Tweaks are typically written using a framework called Cydia Substrate (or its modern alternative libhooker). Here’s how they work:
- Method Hooking: The tweak “hooks” into specific methods/functions in the iOS system or applications
- Code Injection: It injects its own code to run before, after, or instead of the original function
- Behavior Modification: This allows the tweak to change what the original code does
Examples of Popular Tweaks:
- Filza: File manager that lets you access the entire iOS filesystem
- frida-server: Enables Frida communication
- openssh: SSH server for remote access
- AppSync Unified: Signature verification bypass
- NewTerm: Terminal emulator for on-device commands
- SSL Kill Switch 2: Disables SSL pinning
Repository Configuration
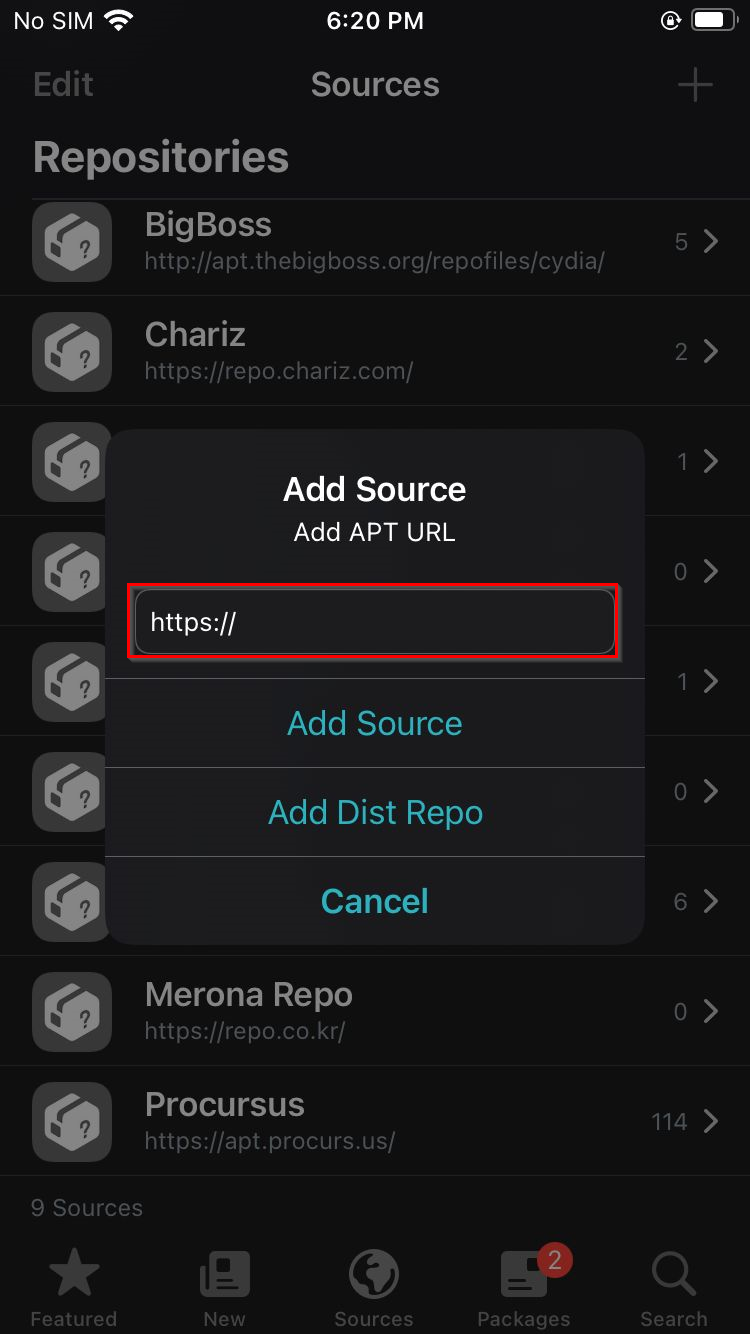
Important Repository:
- procursus: Main repository for modern jailbreak tools
- Must be added to your package manager for access to essential packages
Conclusion
Our journey through Part 2 has been methodical and precise. We’ve equipped ourselves with the essential tools and knowledge needed to penetrate iOS’s defenses. We’ve laid the groundwork for effective penetration testing by understanding jailbreaking, mastering IPA manipulation, configuring our intercepting proxy, and assembling our toolkit.
Just Like Feitan assembling his Pain Packer, we have configured each component with precision. The theory ends here. In Part 3, we cease preparation and unleash this arsenal. not with speeches, but with action. The real penetration begins.
Quote From Feitan: The tools are sharpened. The path is open. Enough preparation. Now we hunt.